Knife Sharpening Made Easy
-

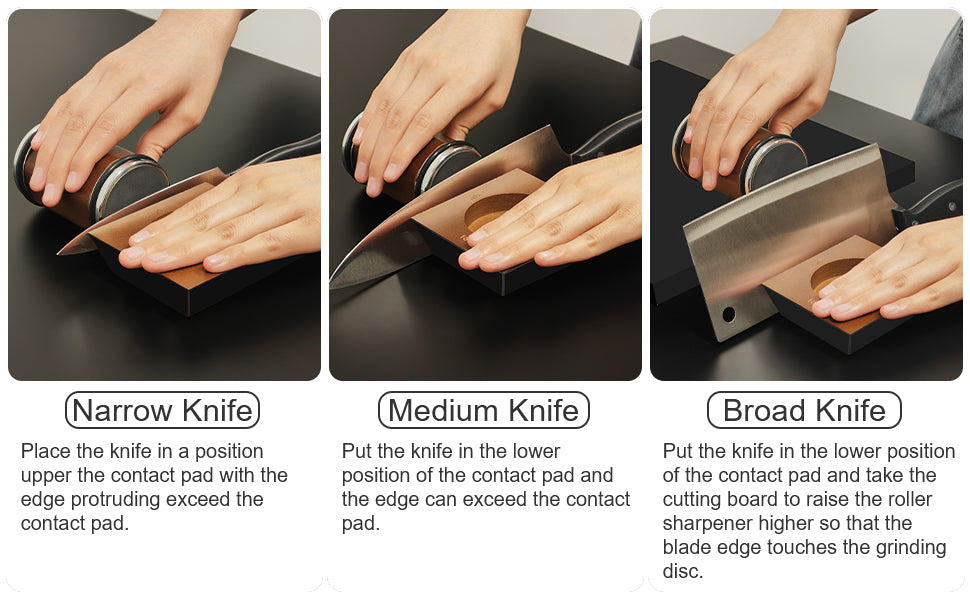
Step 1 - KNIFE PLACEMENT ON BLOCK
The initial sharpening involves the crucial first removal of steel and establishing a consistent sharpening angle. This may take 5 – 8 minutes, depending on the initial condition or dullness of the blade.
-

Step 2 - SHARPEN FIRST SIDE OF KNIFE
Start with the diamond disk. Place the magnetic holder firmly onto a stable the surface and grab the Rolling Sharpener with the other hand. Roll the RollSharp along the entire cutting edge of the knife. Don’t forget the tip!!!
-

Step 3 - SHARPEN OTHER SIDE OF KNIFE
Rotate the knife by 180° and repeat the sharpening process with the Diamond Disc so that both sides are sharpened evenly.
-

Step 4 - REMOVE SHARPENING DUST
After sharpening, clean the knife with
a cleaning cloth. You will notice the dark abrasive dust that the diamond disc created. This is a sign that you have achieved an effective result with your RollSharp. -

Step 5 - CHECK FOR BURS
Carefully check with your fingernail whether a burr can still be felt on the cutting edge. If so, repeat the sharpening process starting at step (1) until no more burr can be felt. This is how you achieve maximum RollSharp sharpness!!!
-

ADVANCED SHARPENING TIPS
Use a light amount of pressure! Sharpen on a stable surface such as a kitchen counter or cutting board. For taller knives support the RollSharp Rolling Sharpener with a cutting board so the sharpener is elevated to the level of the cutting edge.